If an improper installation results in an unhappy customer, a callback for the retailer and a black eye for the industry, then it only stands to reason that all  involved do whatever they can to get the job done right the first time. And any professional installer will attest that part of the equation involves the adhesive used.
When it comes to adhesives, three key issues must be considered: Is it the right glue for the job? How much glue should be applied for the given appliction? and Which conditions are most beneficial for success?
These questions must be answered to ensure a successful installation. With that said, industry experts weighed in with some tips that contribute to a hassle-free job.
1. Cleanup
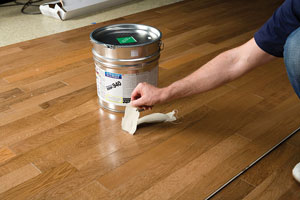
Larry Scott, technical director of DriTac, said when it comes to installing hardwood, in addition to subfloor preparation, cleaning up as you go is always recommended. “When using a moisture-cured, urethane wood flooring adhesive, it is extremely important to make certain you clean up as you go.” He advised keeping urethane adhesive remover and a supply of clean cloths readily available at the start of the installation. “Frequently change to a clean cloth to avoid further spreading the adhesive throughout the finished floor.”
Urethane adhesives must be cleaned while they are wet, Scott explained, because once cured they become very hard to remove. If you find cured urethane adhesive on the surface of the wood, apply a generous amount of a urethane cleaner, be patient and allow the cleaner to work on the spot. Wipe or blot the area and repeat if necessary to remove the glue. “Cloudy and shiny spots could be the result of rubbing too vigorously while cleaning the surface of the wood flooring. Attempting to scrape dried or cured urethane adhesive off the surface of hardwood flooring also increases the risk of damaging the floor’s finish.”
If the surface of the flooring is damaged, he suggests a couple of helpful hints: “Contact the wood flooring manufacturer for recoating procedures. Also, never attempt to remove urethane adhesive from tools or flooring with water as this will cause the glue to cure more rapidly.”
2. Check for moisture
Bob Sweezey, technical director for Stauf Adhesives, believes the first and most critical installation step is to take a moisture reading of the concrete. “There is no wisdom in, ‘If it looks dry, you can lay it.’ The installer is simply playing Russian Roulette and will eat the job when everyone else asks, ‘You didn’t measure for moisture? Your bad!’ A simple, quick test using any one of several moisture meters on the market will indicate if the job is safe to install, and it will protect your reputation.
“Once you take the reading,” he explained, “write it on the floor where you take it and log it on your job sheet for your permanent records. That way, should you ever be questioned, you have absolute proof you took this critical test. If the moisture meter reads higher than recommended, then you must do a calcium chloride test to fully protect yourself.”
Sonny Callaham, flooring for Para-Chem, said moisture problems will not go away anytime soon. “I always tell contractors, it is not your responsibility to control the moisture level in the slab, but it is your responsibility to know what it is at the time of installation. The best scenario is when the building contractor writes the spec to include a third party to perform the testing. This pre- vents a battle between the flooring contractor and building contractor. Just ensure the testing firm is qualified and follows current ASTM standards.”
According to Bostik’s Phil Pitts, senior market manager, Hardwood Installation Systems, the most commonly asked technical question the company gets is, “What is the maximum subfloor moisture that your adhesive and vapor barrier system can be used?”
“Our answer surprises many because we don’t have one,” he explained. “There is no upper limit. The floor must simply be dry to the touch and have no standing water. Moisture emissions are a moving target. So, we engineer our moisture vapor protection and adhesive systems to work with any moisture vapor emission rate (MVER).
“Often we say controlling the moisture from beneath is relatively simple using the correct products and techniques,” said Pitts. “It is moisture from the top, specifically from humidity, housekeeping spills and leaks that we cannot control.
3. Know your subfloor
Tom Pope, manager of technical services for W.F. Taylor, believes the No. 1 tip going into any installation is to know your sub- floor. “The flooring installation will only be as good as the surface the installer is trying to adhere to. Dust, paint, drywall overspray, curing compounds, parting compounds, oil or any other contaminant must be removed prior to attempting to adhere to any substrate. Also, don’t forget moisture is always present in a concrete subfloor. You have to know just how much moisture is present.”
Stauf’s Sweezey agreed, noting every installer is only as good as the subfloor. “That subfloor must be solid, clean, dry, level to 3⁄16-inch in 10 feet, free of dust and debris, and uncontaminated. Put some drops of water on it as a final step. If it beads up and doesn’t soak in, then you may also need to mechanically treat the floor (36 grit sandpaper, sand blast or carbide tips) if it has a sealer that is incompatible with the adhesive you intend to use.”
4. Use the correct trowel
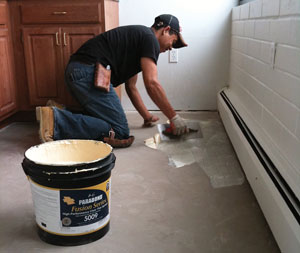
“Adhesive manufacturers do not put trowel recommendations on the pails just to sell more adhesive,” Pope said. “The recommended trowel is there because when properly applied this will place the correct amount of adhesive on the sub- floor, which will create the optimum bond strength. Remember, trowels wear out when being used, especially when spreading adhesive on a concrete subfloor. Trowels should be replaced or re-notched on a regular basis to ensure the proper amount of adhesive is being applied.”
Para-Chem’s Callaham added, “If there is a claim, especially a bond claim, the first thing checked will be the trowel used. Specific manufacturers have specific recommendations for their product; what works with one adhesive may not work with another brand.”
5. Read the directions
Pope pointed out, “Refocusing on basic fundamentals doesn’t hurt, as you never know when you might learn something new. Just because someone else has  always performed an installation one way doesn’t mean it is the correct way. If a mechanic is not certain of the instructions, he should contact the manufacturer’s technical department and receive clarification of the procedures before he begins the installation. Too often, floors have been installed with disastrous results because of limited knowledge or under- standing by the installer. In many cases, a simple phone call could make the difference.”
Callaham believes reading [the directions] is fundamental. “First and foremost, mechanics should read the label and/or technical data sheet before installation. Familiarize yourself with the adhesive and flooring that is being installed. Even if it is a material that you are very familiar with, take the time to read through the installation guidelines as they may have changed.”
Regarding vinyl installations, Jeff Johnson, Mapei’s product manager for its Floor Covering Installation Systems line, said sheet floors typically require the use of specialty adhesives that are specifically designed to accomplish challenging applications. “Pay close attention to the manufacturer’s recommendations on the label regarding trowel recommendations, flash time, working time limits and mixing instructions.
“Trowel the adhesive perpendicular to the length of the flooring to be installed,” he explained. “Running the roller in this same direction allows you to squeeze out air that may have been trapped in the trowel ridges, further promoting a perfectly smooth, desirable finish layer.”
6. Wait to walk
Never walk on vinyl sheet floor- ing that has been just laid into the adhesive. “If this is unavoidable, create walking boards using pieces of plywood or Styrofoam insulation board over the freshly laid flooring,” Johnson said. “Walking boards help to keep foot traffic from squeezing adhesive out from under the floor to create thin spots and, ultimately, bubbles. Where the flooring lacks sufficient adhesive to properly bond to the subfloor, an undesirable substrate defect becomes visibly obvious.”
7. Water-based adhesives
“Don’t use water-based adhesives to install solid vinyl sheet flooring directly over nonporous substrates,” Johnson added. “Water- based adhesives cure through evaporation, so installing them over nonporous substrates with- out providing proper flash time will result in an adhesive bed that never dries—and can never truly bond to the floor. To prevent this type of solid vinyl sheet installation failure, use water-based adhesives only when a nonporous subfloor has been skim-coated with a cement-based patching compound or covered with a self-leveling underlayment.”
8. Acclimation
For carpet, Joe Tuttolomondo, vice president/general manager of XL Brands, noted the first requirement for a successful installation is to have the jobsite, carpet and adhesive acclimated to a temperature between 65 and 95 degrees and humidity from 10% to 60% for at least 48 hours before and after installation. “This also must be done before any moisture or pH testing is performed, otherwise the test results will not be reliable. Adhesive applied to a cold concrete slab won’t adhere properly and will take longer to tack up and dry. Glue may also be irreversibly destabilized if applied to a cold floor.”
9. Roll lightly
Following the installation, Tuttolomondo concluded, carpets should be rolled with the lightest roller possible. “You only need to make sure the carpet has made good contact with the adhesive. Do not continuously pull the broadloom back to observe adhesive ‘legging.’”
10. Style points
Doug Mannell, instructor for INSTALL Kansas City, Mo., noted that the application technique of the adhesive by the installer is critical. “INSTALL teaches the installer must spread [cut in] to the walls tight, leave no voids or puddles and finally not spread into another area where a different adhesive is to be applied. The two adhesives could cause a bond failure.”
According to Pitts, “There is the importance of acclimation. Once wood flooring is installed, it has airflow over the top, not bottom. If flooring hasn’t acclimated to its final ‘equilibrium moisture content’ for the structure the top may actually dry and shrink, or absorb water and expand. We recommend installers follow manufacturers’ recommendations and NWFA specifications for acclimation— according to geography—in order to reduce negative effects of the local environment and moisture above the flooring.”
-Louis Iannaco
